Creating Events
There are three places in the Web Portal where scheduled events can be created. All three methods use identical windows with identical options.
On the Dashboard, click the "Create Event" button. On the Calendar page, click on a time and/or date that you want to create an event for, or click "Add event". From the Contacts page, select a few people you'd like to be invited to the event you are creating, then click "Start Event"
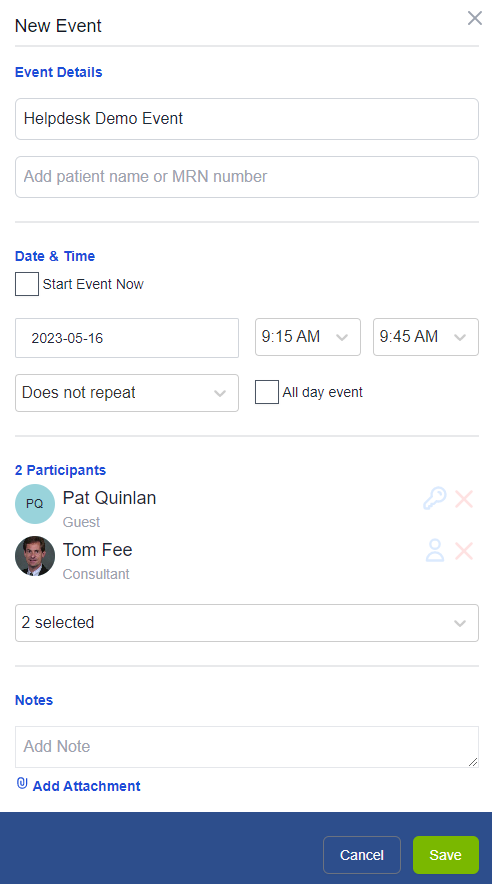
Once you are in the Event Creation Window (pictured below) there are several options to fill out. They are detailed below:
Add Event Title This event title will appear in the calendar page. Add patient name or MRN number This field is optional, but can be useful for reports and patient data lookup later on. Date & Time Depending on what method you used to generate this event, the "Start Event Now" box may or may not be ticked. If it is ticked, as soon as you click "Start Now" the call will be started. This method will prompt the invitees of the call to have their devices start ringing, similar to a phone call. If it is unticked, proceed to set the start and end time you desire. Participants This is where you can add others to the event. Start typing their names, and they will pop up to be clicked on. Once a User has been added, they have two options next to them, as seen in the image below. Clicking the person icon will switch it to a Key icon, making them a Host for that call. Clicking the red X will remove them from the invite. Notes Add notes for your meeting. This can be an agenda, instructions, or any other information. Keep in mind that all participants on the event can see these notes.
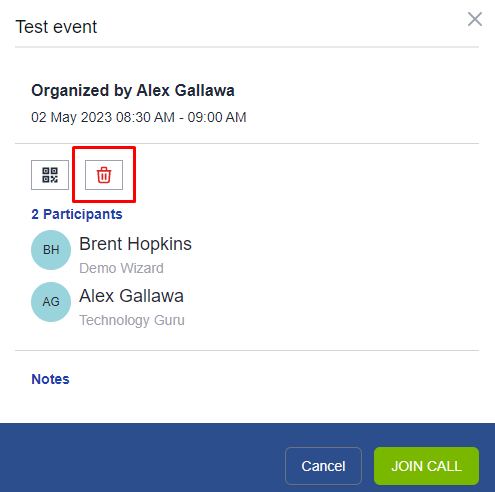
Deleting Events
If you are the event creator, find the event you want to delete on the calendar page and click on it.
Click the red trash can icon as shown in the picture below, and confirm your decision in the popup that follows